Events In Nevada County, Lifestyle
Nevada County Rotary Clubs Give Back

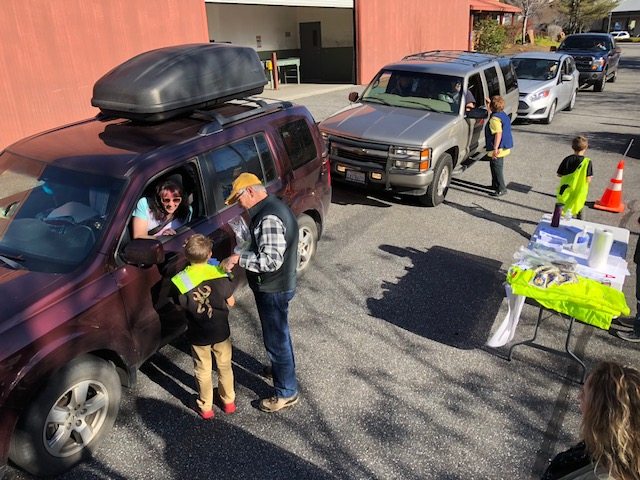
Rotarians Meet Happy Tree Planters
The five Rotary Clubs in Nevada County joined together to give away free trees in support of Rotary’s Earth Day 2018 objective of planting a tree for every Rotarian. Rotary’s International President, Ian H.S. Risley, challenged every one of more than 52,000 Rotary Clubs worldwide to help protect the environment and curb climate change in a sustainable way by planting a tree for each of more than 2 million Rotarians. One of many ways Nevada County Rotary gives back to our communities.
One of the wonderful reasons we love Nevada County is the plethora of opportunities to give back to our community. More non-profits per capita than any other county in the State of California make this amazing place home. The Rotary Club of Nevada City, The Nevada City 49er Breakfast Rotary Club, The Rotary Club of Grass Valley, The Rotary Club of Grass Valley South, and the Rotary Club of Penn Valley joined forces, as they often do, to make it happen to give back to communities in Nevada City, Grass Valley, Penn Valley and surrounding communities.
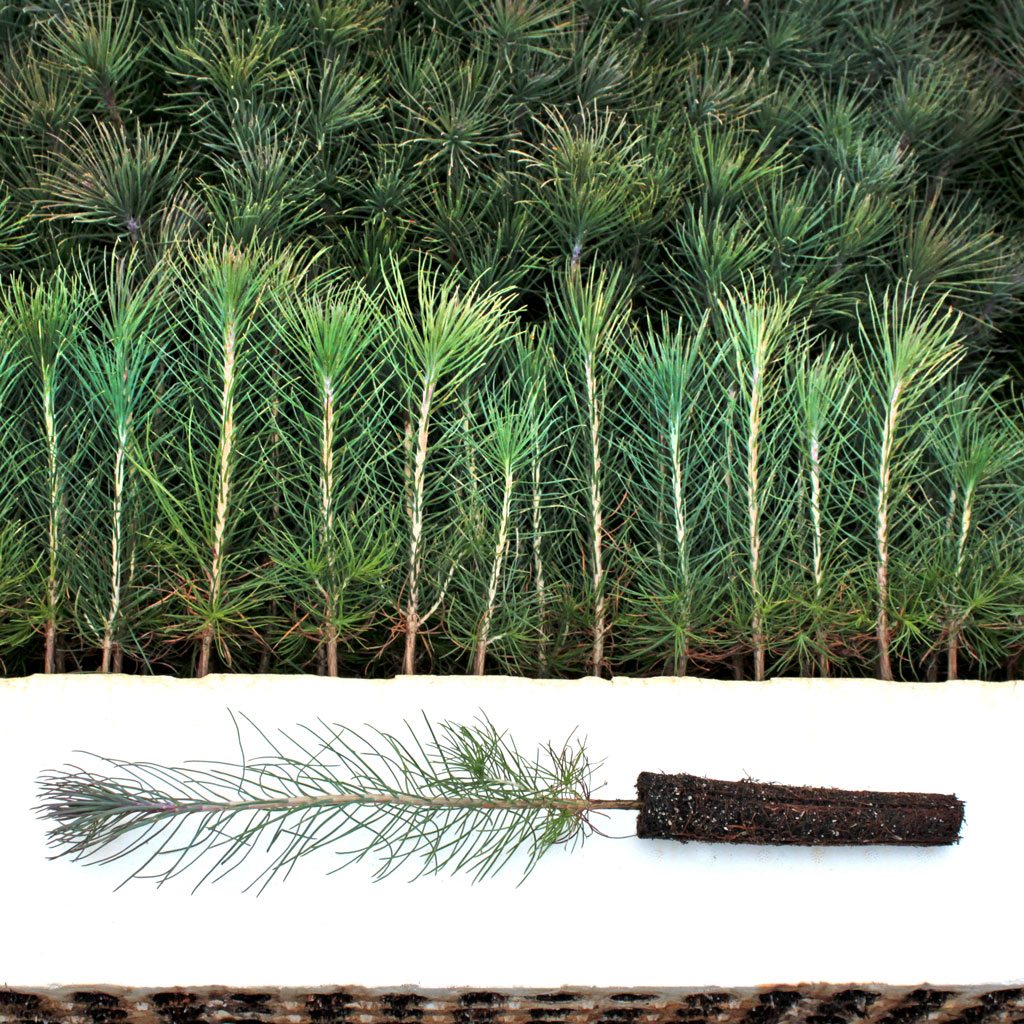
Rotary Gives Away 400 Ponderosa Pines in 3 Hours!

Young Ponderosa Pine Trees
An so, on Saturday January 13, Rotary’s Free Tree Giveaway was on! 400 Ponderosa Pines, purchased from CalForest Nurseries were given away to interested folks in or local community. Why Ponderosa Pines? CalForest Nurseries recommends Ponderosa Pines: They are native to the area, are stable and sturdy trees able to withstand high winds, are beautiful trees that help with erosion control and can grow to 50-90 feet high, can live up to 250 years, and water requirements are between 12 and 40 inches a year. We appreciate CalForest Nurseries partnership, making available 400 your trees at an affordable cost. CalForest gives back!
Truly a Nevada County community event, our local newspaper, The Union, assisted with advertising and promotion and offered the drive-through parking lot in Grass Valley for Rotary to stage the giveaway. KNCO Radio in Grass Valley welcomed local Rotarians to discuss the event for an hour of air time. YubaNet helped promote the event on line. Ron Knauss, a longtime Rotarian with the Nevada City Rotary Club and an expert in forestry helped determine best planting timing and assisted with planting and care instructions.
Larry Davis, a member of the Rotary Club of Grass Valley South provided the clubs with invaluable assistance, managing the project and putting together an excellent pamphlet of Tree Planting Instructions: Guidelines for Selecting The Perfect Location, Digging The Hole, Filling The Hole, and Care. Since many tree enthusiasts are enlisting their children in the tree planting effort, the pamphlet is central to educating the young tree farmers as to the importance of planting and caring for our trees.
400 Local Carbon Sequestration & Oxygen Generating Machines To the Rescue!
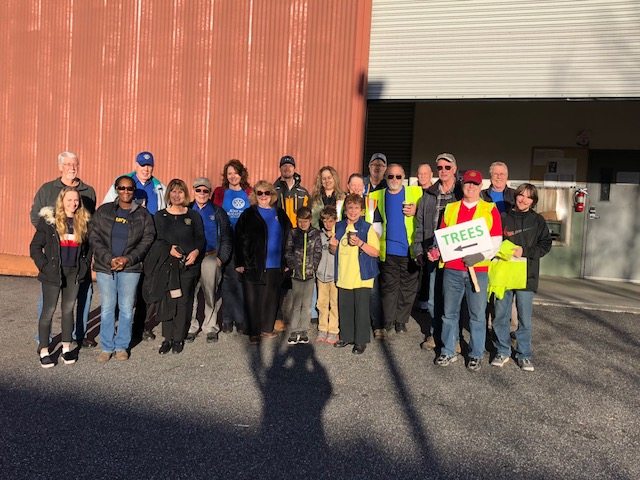
Tree planters visited us from Nevada City, North San Juan, Grass Valley, South County and Penn Valley among other communities and were asked to regale us with pictures, videos, or written stories of their trees. We eagerly await those stories. Their trees will reduce carbon in the environment and deliver oxygen at the same time. Great job Nevada County.

Happy Rotarians Give Back

Lifestyle, Nevada County Schools, Real Estate
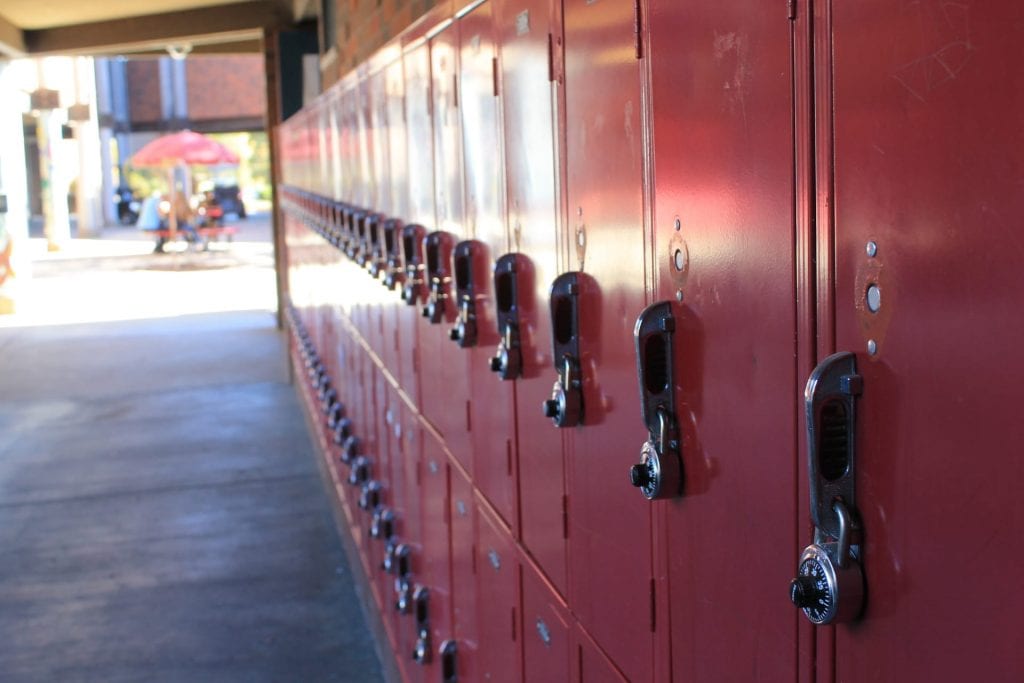
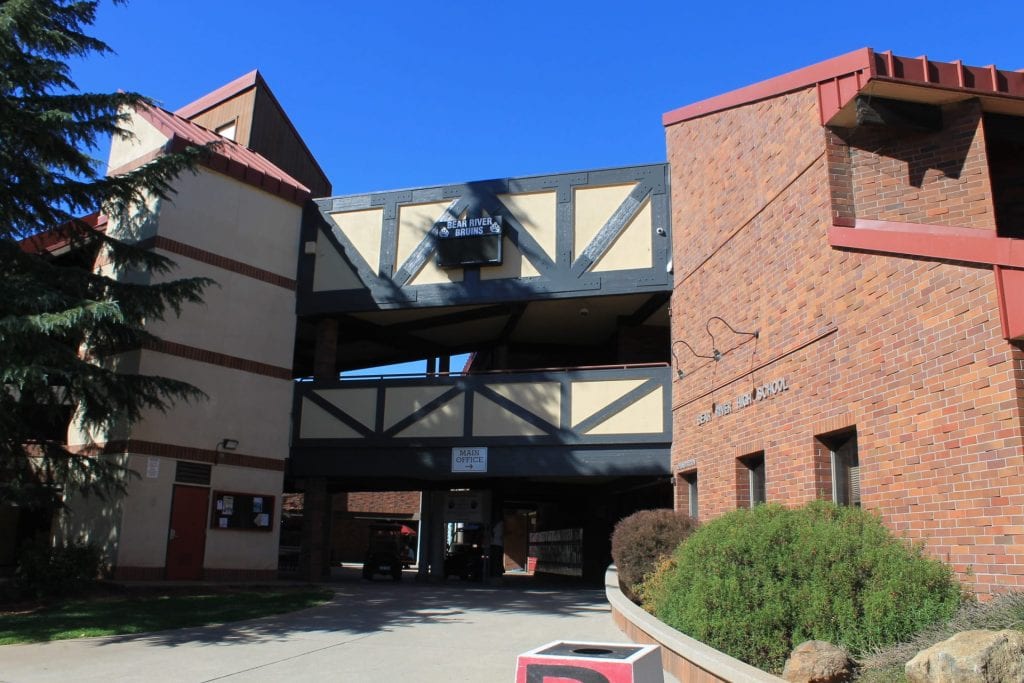
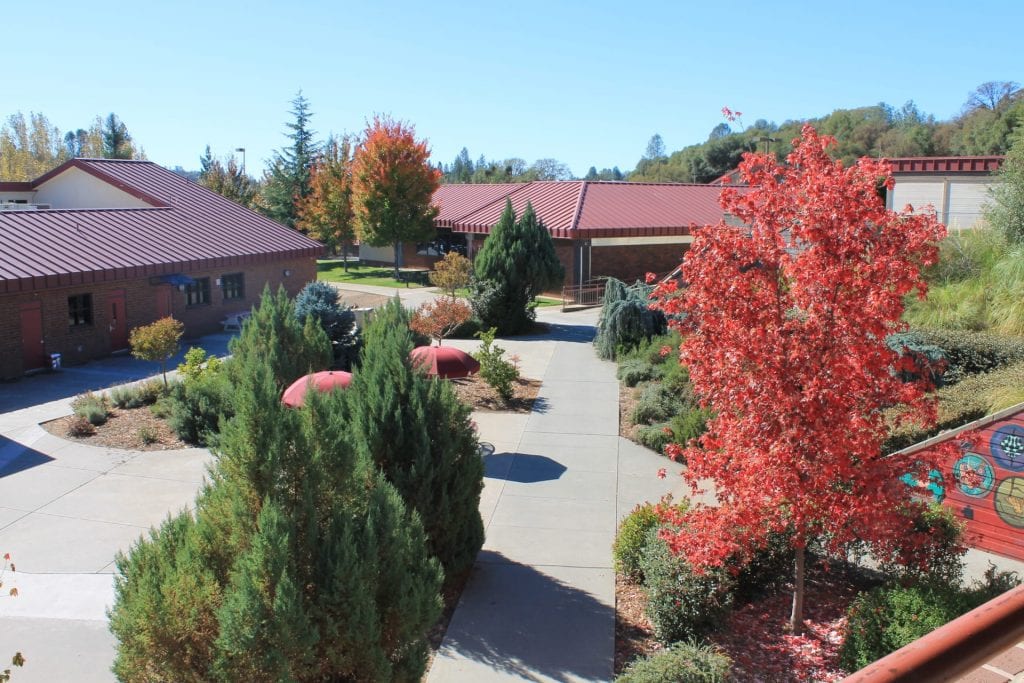
Nevada County Schools Rank High
The high quality of schools in Nevada County, and diversity of selection especially in Elementary Education, of is well known. Below we detail key grades given to our local schools in Nevada City, Grass Valley, Penn Valley, and surrounding communities as ranked by www.niche.com.

Elementary Schools in Nevada City, Grass Valley & Penn Valley.
Clear Creek Elementary School, Public, Grass Valley – K-8 Overall Grade A, 149 students, 19:1 Student/Teacher ratio.
Nevada City Charter School, Public Charter, Nevada City – K-8 Overall Grade B+, 55 students, 21:1 Student/Teacher ratio.
Alta Sierra Elementary School, Public, Grass Valley – K-5 Overall Grade B+, 289 students, 21:1 StudentTeacher ratio.
Cottage Hill Elementary School, Public, Grass Valley – K-5 Overall Grade B+, 474 students, 22:1 Student/Teacher ratio.
Deer Creek Elementary School, Public, Nevada City – K-4 Overall Grade B, 410 students, 21:1 Student/Teacher ratio.
Yuba River Charter School, Public Charter, Nevada City – K-8 Overall Grade B, 292 schools, 24:1 Student/Teacher ratio.
Ready Springs Elementary School, Public, Penn Valley – K-8 Overall Grade B, 212 students, 24:1 Student/Teacher ratio.
Grass Valley Charter School, Grass Valley, Public – K-8 Overall Grade B, 511 Students, 23:1 Student/Teacher ratio.
Nevada City School Of the Arts, Public, Nevada City – K-8 Overall Grade B, 390 students, 23:1 Student/Teacher ratio.
Bell Hill Academy, Public, Grass Valley – K-4 Overall Grade B, 201 students, 22:1 Student/Teacher ratio.
Sierra Montessori Academy, Public, Grass Valley, K-8 Overall Grade B, 100 students, 16:1 Student/Teacher ratio.
Chicago Park Elementary School, Public, Grass Valley, K-8, Overall Grade B, 121 students, 22:1 Student/Teacher ratio.
Twin Ridges Home Study Charter School, Public Charter, K-8,Nevada City, Overall Grade B, 118 students, 26:1 Student/Teacher ratio.
Forest Charter School, Public Charter, Nevada City, K-12, Overall Grade B-, 720 students, 19:1 students, 19:1 Student/Teacher ratio.
Margaret G. Scotten Elementary School, Grass VAlley, Public, K-4, Overall Grade C+, 500 students, 22:1 Student/Teacher ratio.
Union Hill Elementary School, Grass Valley, Public, K-6, Overall Grade C+, 486 students, 26:1 Studnent/Teacher ratio.
Chicago Park Elementary School, Public, Grass Valley, K-8, Overall Grade C, 52 students, 22:1 Student/Teacher ratio.
Grizzly Hill, Nevada City, Public, K-8 Overall Grade C, 91 students, 22:1 Student/Teacher ratio.
Union Hill Home Charter School, Grass Valley, K-8 Overall Grade B, 16 students, 7:1 Student/Teacher ratio.
Williams Ranch Elementary School, Public, Penn Valley, K-3 Overall Grade B, 218 students, 22:1 Student Teacher ratio.

High Schools

Nevada Union High School, Public, Grass Valley, 9-12 Overall Grade B-.
William & Marian Ghiddotti High School, Grass Valley, Public Alternative, Overall Grade A+. Ghiddotti High is a college prep high school component of Nevada Union High, considered by many to be one of the best High Schools in the state of California.

Bear River High School, Public, Grass Valley Overall Grade B.

Niche.com has a wealth of information. Visit the site to view expanded grading categories and methodology the site uses to evaluate schools and assign grades. What is cool about this site is that it connects with Realtor.com to allow you to view houses in each vicinity and to gather neighborhood data.
Johnson & Geare’s Sierra Lifestyle team has personal experience with many of the local schools here and is happy to share experience and impressions with you. Please contact us with any questions.

Community Events, Events In Nevada County, Important News and Info, Lifestyle
Summer…my favorite time of the year for fresh fruit and vegetables! And Nevada County offers a huge selection of farmers markets to choose from. Grass Valley, Nevada City, Penn Valley and other

surroundings area host farmers markets where we can gather great fruit, vegetables and other food items to enjoy. Farm to table at it’s purest and best.
Farmers from around California come to sell their farm fresh items. Here is Nevada County we are blessed to have farmers markets available to us on several different days of the week, and a variety of locations make it convenient. From South Nevada County to Penn Valley the farmers market are sprinkled through out the week in various locations.
My favorite is Thursday Night Market in Downtown Grass Valley. This event takes place On Thursdays evening 5:30pm to 9pm in Historic downtown Grass Valley. Similar to other events downtown Grass Valley throughout the year, Mill Street is closed to traffic and all sorts of vendors set up booths selling everything from fresh fruits to homemade bath soap and more. They are also offer street concerts for your listening enjoyment. Thursday Night Market takes the usual farmers market to a whole new level, supported by Grass Valley’s Downtown Association.
So take a peek below at all your choices. I encourage you to check out the various markets. We are so lucky to have in our back yard so many talented, hard-working local farmers committed to bringing fresh-picked food to out tables!
Local Nevada County Farmers Markets
Tuesdays:
Nevada County Horseman (Nevada County Certified Growers Market)
May 2 – September 26, 2017
Tuesdays, 9:00am – 1:00 pm
10600 Bubbling Wells Road, Grass Valley
Thursdays:
Western Gateway Park (Nevada County Certified Growers Market)
May 4 – November 16, 2017
Thursdays, 9:00am – 1:00 pm
18560 Penn Valley Drive, Penn Valley
Thursday Night Market
June 29, July 6, 13, 20, 27 & August 3, 2017
5:30pm – 9:00pm
Downtown Grass Valley
Saturdays:
Historic North Star House (Nevada County Certified Growers Market)
Saturdays, April 15 – November 18, 2017
8:00am – 12:30 pm
12075 Auburn Road, Grass Valley
Downtown Nevada City Summer Farmers Market
Saturdays, June 3rd – November 18th 2017
Hours 8:30am – 1:00pm
Contact information for farmer’s markets
Foothill Farmers Market Association
Lake of the PInes Farmers Market
Nevada City Farmers Market
Nevada County Certified Growers Market

Important News and Info, Lifestyle, Real Estate

Selling your home in Nevada County can feel like a daunting task. With the right agents, and by following a few “rules” it can be not only easy, but pleasant as well! The info graphic to the right is an excellentstarting point for what some turn-offs for sellers are.
Stained and/or damp patches on ceilings and walls.
Painting is one of the most affordable updates you can do for your home. Clean walls in neutral colors can not only make the home feel new, but it helps buyers envision their possessions in this space.
It’s important to resolve any leaks prior to painting. If you need a referral for a repair service, let us know.
Odors
Odors can also be mitigated by painting. Cleaning or replacing carpets may be necessary as well depending on the strength and source of the odors. While this seems like an expense, it can not only be the difference on if your home sells, but how quickly, and for how much.
Dull Lighting
Dull or dim lighting can be a huge turn off for buyers. Even a dark house can be well-lit with the right wattage of bulbs. The new LED style bulbs are excellent as they save money while providing the same, or even more light than a standard incandescent bulb. Also, make sure drapes and blinds are open in all areas to bring in more natural lighting as well.
Outdated Bathrooms
Out dated bathrooms with stained sinks, bathtubs, showers and floors are a huge turn off. Sometimes something as simple as new faucets and a new light fixture can be all that is needed to update and beautify this space. Also, make sure there is plenty of light in the bathroom as well. Also, install a nice smelling scent dispenser like a plugin or essential oil diffuser to help with unpleasant odors.
Cluttered Rooms
Cluttered rooms can kill a sale very quickly. A potential buyers needs to be able to not only comfortably walk through your home, but also not be distracted by too many photos, knickknacks and decor. If they can’t see the floors and the walls because of too much stuff, they cannot envision how they would use the space. Counters and tables should be cleared, art work should be kept neutral, and to a minimum, and corners need to be cleared. Put the shoes in the closet, and keep throw blankets out of sight as well. Less is more!
Over The Top Decor
This also falls in with clutter. Even if orange is your favorite color, cover the walls with a more neutral shade of paint. Keep the cheetah prints, furry rugs and pillows and things of that nature tidied away. Too many distractions will chase a potential buyer out the door very quickly!
Thinking of selling your home in Grass Valley, Nevada City, Penn Valley or the surrounding areas?
Give us a call and we will be happy to not only meet with you, but share more secrets on a quick sale! We have buyers waiting for homes to come on the market, so give us a call today! We would love to show you what our Sierra Lifestyle Team can do!